Creating Invoices for Applicants
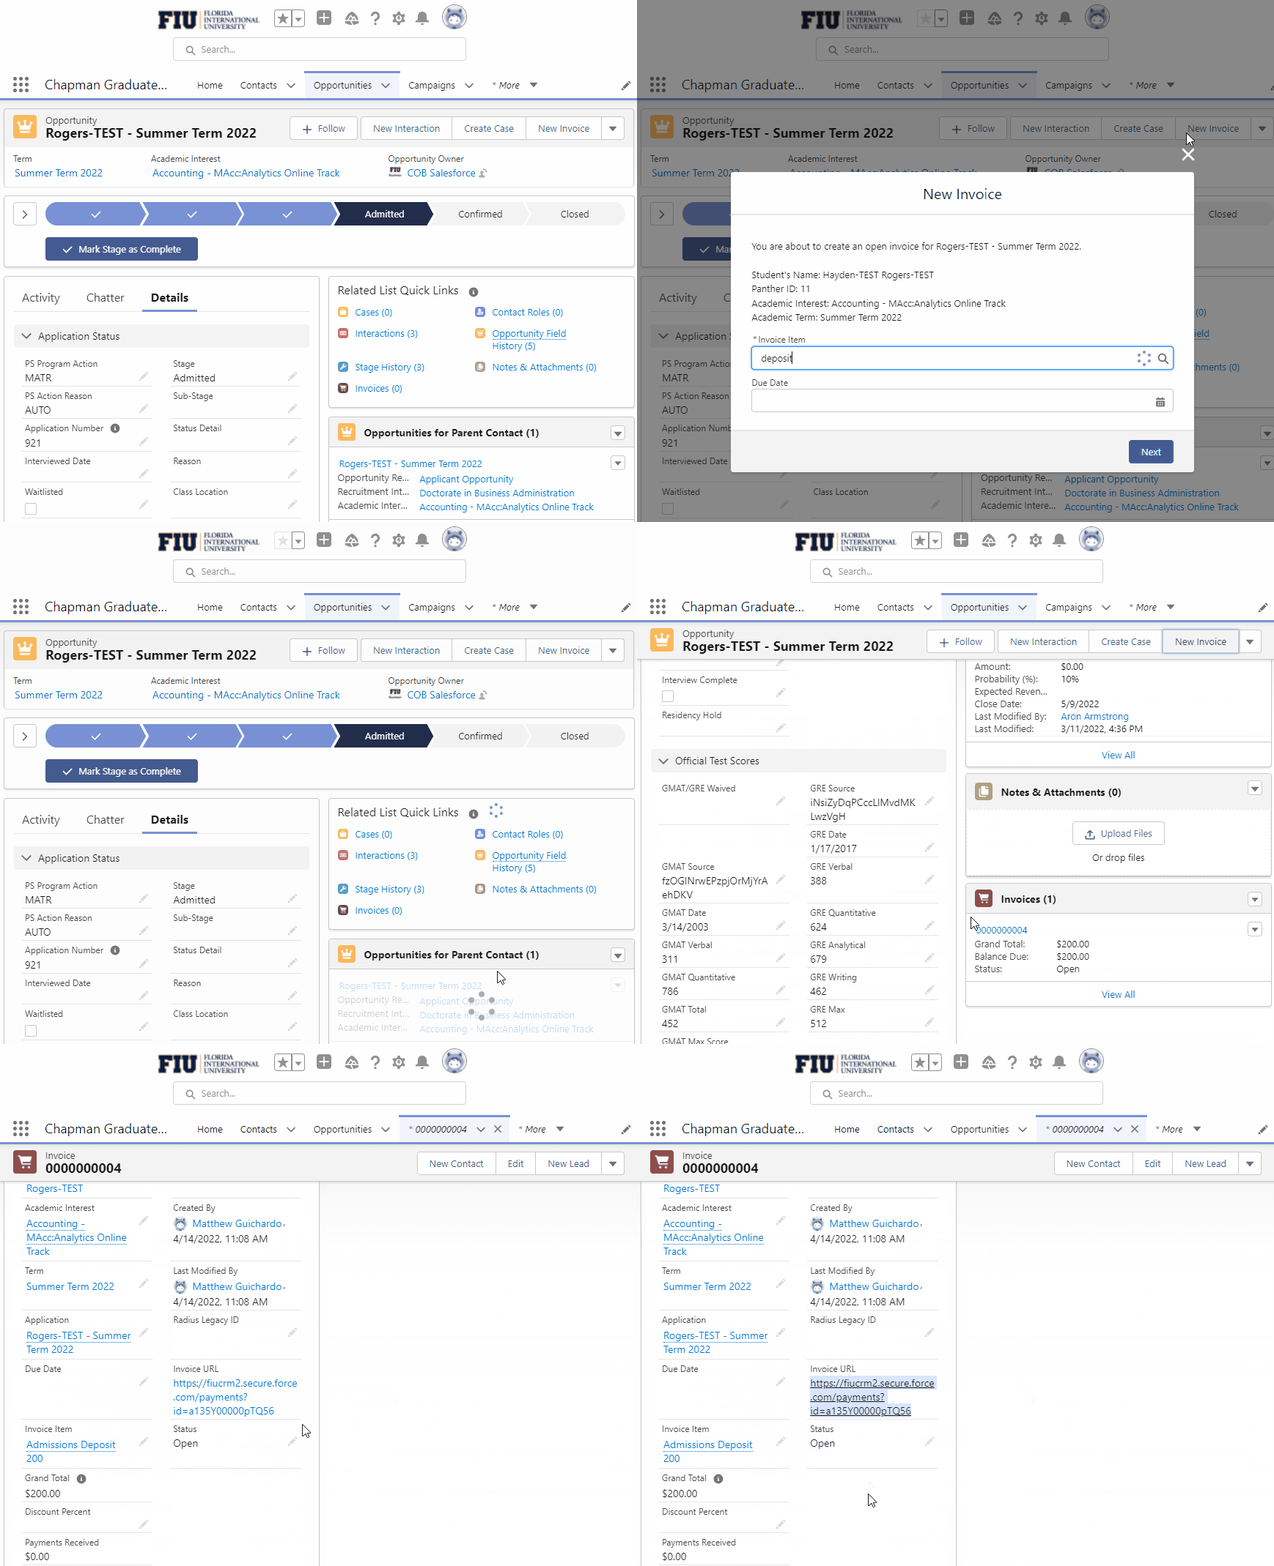
Once a student submits an application, a new button will appear in the top right corner of the screen called “New Invoice”.
Once the button is clicked, a screen will show with the Application’s information. Type out the name of the item that the student will need to be invoiced for in the ‘Invoice Item’ text box (e.g. “Admissions Deposit 200”, “Parking 27.50”). You can also type 200 or 27.50 to quickly find the item instead of the whole string of text.
If you enter a Due Date, Salesforce will send an email to the student 7 days before reminding them that they have an outstanding open balance. (At the moment this field is not required)
Find the newly created Invoice in the Related Links and click to open it.
Recruiters: Copy the Invoice URL link and send it to the student via email.

Program Managers: You have the option of adding a Discount to the invoice or applying a Waiver.
The Invoice Status field will automatically change to Closed when either the Balance Due = $0.00 or when the ‘Waiver Reason’ field is populated.
When a student makes a payment via the portal, a new payment record is created that is related to the invoice record. A select few will also have the ability to manually create payment records, for students who wish to pay in cash/check.
Administrators
To create new Invoice Items for the recruiters to select from when they create new Invoices, navigate to the Invoice Items object within Salesforce. Click New and enter the details for the Invoice Item.
Invoice Item Name = the name of the item the Recruiters will be searching for
Item Description = the description that the student sees on their payment screen
Grand Total = Grand total of the item
Enable Partial Payments = Allows the student to make smaller payments against the Grand Total
Minimum Payment = The bare minimum payment that the student can make.
(Note: If Enable Partial Payments is checked, Minimum Payment must be populated.)


